
Dealing with decontaminating a home is stressful. From the initial discovery of a problem and figuring out those first steps to inspections and remediations, there is a list of things to tackle before the home is safe again. That’s also not including any adverse health effects from exposure that have to be dealt with as well. Once all of these boxes are checked off, the first question you’re probably asking yourself is, "What do I do after remediation?"
How do you ensure that your home is and remains a healthy environment for you and your family to heal in?
This can seem equally stressful, especially after the PTSD that’s often experienced after dealing with a toxic environment. The key is to gradually begin adding steps into your home maintenance routine to foster a safe space that will promote your wellness.
With that in mind, here are 8 steps to take after remediation to foster a safe environment.
1. Clean and Clean Often

Deep cleaning after remediation is crucial to ensuring that as many microscopic particles as possible are removed from your home. Keep in mind that, as long as the microbial growth was present, it was releasing particles into your indoor environment. These will have settled on surfaces and need to be removed so that high levels don’t continue to exist in the indoor space and contribute to exposure.
Keep in mind as well that these particles could have ridden the air current and zipped into any room in the home. That’s why the entire space needs to be cleaned from top to bottom.
After this cleaning, set up a routine cleaning schedule to ensure your home remains in tip-top shape. We can’t exactly put a bubble around our houses, so particles like mold spores and mycotoxins will inevitably blow inside. It’s up to us to actively work to keep particle levels low. Deep cleaning regularly (including appliances) helps remove particles like spores, bacteria, and toxins. This improves air quality and decreases the likelihood of microbial growth.
Building the right cleaning product arsenal is a key piece of the puzzle. You want to make sure that the tools in your toolkit are up to the task of actually removing microscopic particles from surfaces.
A few great options to get you started include:
Make sure to prioritize dusting as well. Microscopic particles settle where dust settles. Dusting can help reduce the number of particles that get kicked up into the air that proper air filtration must deal with. Make sure to use slightly damp microfiber cloths during this cleaning process, as they are 100 times better at wiping away small particles than regular rags.
While cleaning, it’s inevitable that microscopic particles like mold spores and toxins will get kicked up into the air. To remove these and make sure they don’t settle right back down on the surface, turn on those air purifiers to remove anything floating around in the air. Not all air purifiers are made the same, though, so make sure yours can filter out these small particles instead of just sending them right back into the room.
2. Test Your Dust Annually

Why dust? Gravity brings particles like mold spores, mycotoxins, and endotoxins down to horizontal surfaces like floors, doorframes, and furniture. So basically, where dust collects, so do these indoor contaminants.
Testing this dust once a year will help to determine exactly what’s hanging out in your home and alert you to any potential abnormalities. Highly contaminated dust is not only a health hazard, as all of those particles can enter the body when they’re kicked up into the air when the dust is disturbed. But it also indicates that there’s an underlying contamination problem somewhere in the home.
The Dust Test will help give you peace of mind that you know what’s going on in your home. Think of it like an annual physical to ensure your body is healthy, except in this case, it’s to ensure that your home is healthy. You worked hard to ensure your home was once again a safe space after remediation, so it’s important to make sure that it stays that way.
The Dust Test will help you know if there’s a problem before spending thousands of dollars trying to find one (both medically and in your home). And, if there is a problem, the data will indicate what you’re being exposed to before your inspector comes so that you can ensure they will find where it’s coming from. From there, you can jump into resolving the issue. The sooner you find and remediate the contamination, the less exposure you’ll face, and the less likely it is that another problem will develop elsewhere.
3. Spring Clean Annually

It’s probably safe to say that very few people enjoy that dreaded spring cleaning. While it’s a great way to declutter a home and get it ready for the warm months ahead, it’s also an essential step in helping keep our homes healthy. The cleaner they are, the safer they will be.
Ultimately, the goal is to clean as deeply and thoroughly as you did after remediation. Make sure to tackle all of the spaces that don’t get a ton of attention throughout the year. This can include the tops of door frames, cabinetry, wall decor, behind kitchen appliances, and all of the hard-to-reach places. Another great step is to pull out the appliances and clean behind them.
Essentially, focus on anything that’s not often seen.
Another great step is to throw any washable, porous items into the laundry machine with a laundry additive. This can include bath mats, shower curtains and liners, towels, blankets, curtains, furniture covers, and anything else laying around. Make sure to double-check with the manufacturer’s instructions on any cycle and drying suggestions, as well as to make sure they can actually be placed in the washing machine.
One tool to get you started is investing in the Homecleanse Kit. The products included are all of the tools we use to deep clean indoor environments and ensure that as many microscopic particles are removed as possible. It also comes with instructions on how to properly clean and use the products, taking the guesswork out of it for you.
4. Change HVAC Filters

Air filters are the first line of defense both for the HVAC system and your indoor air. These barriers help eliminate contaminants so that they don’t continue to circulate throughout the indoor space. It also helps remove them before they reach the HVAC, which can help avoid microbial growth in the unit itself.
That being said, if they’re past their time to be replaced, chances are that they’re packed full of all sorts of particles. This will affect their ability to filter, leading to lower indoor air quality. It can also put a strain on the HVAC system as it works overtime to pull air through the clogged filters. That scenario can lead to you spending money fixing or replacing the unit, which is definitely not something we want in our homes.
All filters are different, so check with the manufacturer’s instructions on how often to change them. Set up a reminder to change them at this time, but also routinely look at them to see if they need to be changed ahead of schedule. If you’re not sure whether to change the filter earlier, a few signs to look out for include discoloration of the filter, odd odors, higher electricity bills, a decrease in airflow, or dust around the vents or condenser coils.
It is also a good idea to switch to the highest-rated MERV filters possible for the specific HVAC system. The details on what can be used can be found in the HVAC manual. The key thing to keep in mind is that the smaller the particles these filters can eliminate, the better. When you’re dealing with microscopic particles like mold spores and mycotoxins, you want filters with the technology to actually eliminate them from the air. Otherwise, they’ll just circulate straight back into the home.
5. Invest in a Whole Home Air Purifier

Air purifiers are rock stars for helping reduce the number of particles floating around in the air. The fewer particles there are, the cleaner your indoor environment will be.
That’s why investing in a whole-home air purifier is such a great decision. These systems are installed at the home’s point of entry and will effectively remove contaminants from the air so that the HVAC system can run efficiently. This filters out particles for the entire home, eliminating the space requirements that smaller units have.
As an added bonus, they also offer a layer of protection for the HVAC itself by eliminating contaminants before they enter the system. Particles such as mold spores can make their way into the system if they’re not properly filtered out and can grow within the unit. As the lungs of the home, this can lead to contamination being spread throughout the entire indoor space.
Not all air purifiers are built the same, though. You want to go with a unit that removes the maximum number of contaminants possible and does it all of the time, not just some of the time. That way, they don’t recirculate back into the environment and potentially make their way into the bodies of those spending time inside. Air purifiers should at least meet HEPA status, meaning that they remove 99.97% of particles as small as 0.3 microns. If it can remove smaller particles, that’s even better. Some can also work to reduce other contaminants such as formaldehyde, VOCs, bacteria, viruses, and biotoxins.
We personally recommend Intellipure’s Super V Ultrafine Whole House Air Cleaner. Their Disinfecting Filtration System (DFS) technology goes beyond normal HEPA standards to capture and remove 99.99% of particles as small as 0.007 microns in size.
6. Routinely Check For Problems

The sooner you can catch a problem, the better. This will help avoid contaminants from moving in and, if they’re already present, decrease the number of particles released that will lower your indoor air quality.
So channel your inspector gadget after remediation and regularly comb through your home throughout the year to make sure that there aren’t any problems.
Here are things to look out for:
Visible Microbial Growth
With so many species existing in the world, mold colonies can come in a variety of colors, shapes, and textures. Some of the most common colors include green, white, grey, blue, red, black, brown, or a combination of them. As for textures, they could be fuzzy, powdery, velvety, or slimy.
If any type of unidentifiable growth pops up, it's safe to assume there’s a mold problem that needs to be addressed.
An Unidentifiable Odor
If you don’t find any visible mold, that doesn’t mean that there isn’t a problem. The growth could be in a hidden location, like underneath flooring, or be too small to be seen by the naked eye yet.
In this case, rely on your nose. Mold growth often creates a damp, musty, earthy smell due to the release of gases called microbial volatile organic compounds (MVOC). If you smell this, there’s a good chance that you’re dealing with a contamination situation.
Hotpot areas to check include:
- The toilet tank (lift the lid and peek inside)
- The attic
- The basement
- Crawlspaces
- Grout and caulk
- Windowsills and doorframes
- Appliances
- Exhaust vents
- Showerheads
- Sink faucets
- Mattresses
- House plants
If you happen to find contaminants in one of these places, make sure that you handle the situation properly so that your home doesn’t become a toxic hazard zone. If it’s a smaller problem, like in bathroom grout or on an appliance, check out our blog for steps on how to quickly and effectively resolve the issue.
Leaks

Not all leaks are large events. Sometimes, it’s a gradual drip that results in a larger issue and a perfect opportunity for microbial growth. The sooner you catch a leak, the faster you can start to fix it.
A few places to look include:
- Underneath sinks
- Inside cabinets
- Appliances
- Attic
- Basement
- Around the toilet and shower
- Hot water tanks
Bonus tip: Another great idea to determine if there’s a hidden leak is to assess your water usage and bill. If these are abnormally high, there could be an issue somewhere in your home. In that case, consider hiring an inspector to come in and assess the building. You can also set up leak detection devices to help monitor any hidden problems.
Water damage
Water damage is an open invitation for microbial growth. Mold, for example, can grow on a surface with a food and water source within 24 to 48 hours. Finding and resolving problems quickly can reduce the chance of a contamination situation occurring or of one going unnoticed for long periods of time. This can cause your indoor air quality to plummet.
Things to look out for include:
- Wet insulation
- Rusty nails
- Discoloration on the ceiling, walls, or carpet
- Stains on wood
- Frost buildup underneath the roof
- Structural issues
One of the key components to improving your indoor air quality is preventing moisture from making its way indoors. The less moisture there is, the fewer opportunities there will be for microbial growth. Ensuring the home's exterior is prepped to act as an appropriate barrier is a huge part of this push to avoid water intrusion.
Take a close look around your home to determine if there are any cracks, gaps, or other issues that could allow moisture inside.
Places to check include:
- Foundation
- Attic
- Roof
- Gutters
- Pipes
- Windowsills
- Door frames
- Siding
If you find any problems, take care of them ASAP so moisture intrusion does not occur.
7. Schedule HVAC Service Appointments

The HVAC is essentially the lungs of a home. As such, it’s important to ensure that it’s operating properly and not bogged down with issues like microbial growth. When the system flips from cool air to warm air, condensation can build up within the ducts or the unit itself, which offers the perfect home for things like mold.
If a lucky spore lands in this moisture, it will begin to colonize the space, leaving you with hidden mold growth within the home. This growth will just continue to thrive undisturbed until those warmer or cooler months occur. When you flip the thermostat to the alternate setting (heat or cold), all of those moldy particles will be blown throughout your home. These particles will decrease your indoor air quality and contaminate the surfaces inside.
The change in temperature can also lead to mold growth on other parts of the unit, such as the condensation coil and drip pan.
Routinely scheduling a professional to come in and service the HVAC in the spring and fall, before the warmer or cooler weather settles in, can help avoid this contaminant catastrophe. This individual should test for microbial contamination while assessing the unit so that if there’s a problem, it can be resolved before turning on the unit and blowing it throughout the home. They should also clean the coil, make sure the blower, furnace, and cabinets are clean, and ensure that everything is operating correctly. Think of it as a biannual tune-up and cleanup.
A clean and healthy HVAC system helps maintain a clean and healthy home.
8. Remember to Breathe

It may sound silly, but don’t forget to just breathe after remediation. A large number of people develop PDST after getting sick due to environmental toxins in the home. Not only is exposure difficult on the body, but the entire process can be a huge ball of panic, fear, and heightened emotions.
Let’s face it: society doesn’t talk much about mold or the impact a toxic indoor environment can have on health. Add in the lack of industry standards, and it can be difficult to figure out how to handle a contamination situation and who to trust to help you succeed. Altogether, that makes tackling a remediation project stressful. Chances are there were setbacks, roadblocks, and lots of question marks throughout the process as well.
But, you got through it. You checked off the boxes, dealt with the headaches, and pushed through that dark time. That’s pretty incredible!
After remediation and all that it entails, it’s important to stress less and know you’re in control. You know how to navigate any problems that pop up in the future. You know the steps to take to maintain a healthy home. And you’re much more aware of the impact our indoor environments have on wellness.
So take moments throughout the week to focus on self-care and relaxing, especially if you’re working on healing! It’s difficult to detox when the body is under constant stress and thinking there’s something it needs to battle.
You’ve Got This

Collectively, these steps will help ensure your home remains in tip-top shape. That being said, don’t feel pressured to do everything at once. That mindset can leave you anxious and stressed, which is definitely not what you want to experience after dealing with decontaminating a home and trying to heal.
The goal is to do what you can, when you can. Any step taken to improve your indoor air quality and environment is a leap in the right direction. Having plans in place to address any issues and working towards home health goals is an amazing foundation to have and will give you peace of mind that you’re on the path to success. You’ve got this!
If you have any concerns or questions, just reach out to experts to get their opinion on how to safeguard your home. You are absolutely not alone in this journey.
Showing all 6 results
-
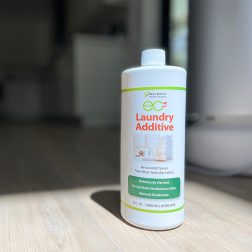
EC3 Laundry Additive
Add EC3 to every rinse cycle to rinse away mold, bacteria and musty odors from...
-
$23.00 Shop Now -
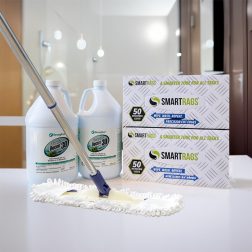
HomeCleanse Cleaning
Take your cleaning to the next level buying all the tools we use to keep...
-
Price range: $299.00 through $549.00 Shop Now -
Mold & Bacteria Contents Cleaning
Remove harmful pollutants that accumulate in the dust of your home. (Options available for renters...
-
Price range: $99.00 through $349.00 Shop Now -

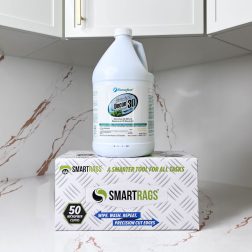
EC3 Mold Solution Concentrate
Micro Balance EC3 Mold Solution Concentrate is a natural botanical that removes mold spores, bacteria,...
-
$33.00 Shop Now -
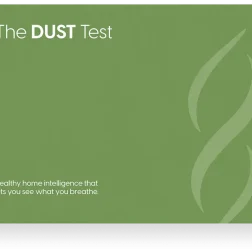
The Dust Test
Optimizing Air Quality starts with finding what’s not optimal. *Detects 36 different species of mold...
-
$299.00 Shop Now -
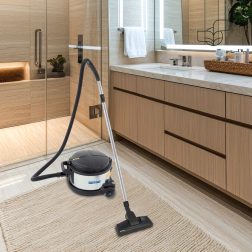
EuroClean 4 Gallon Hepa Vacuum
The Euroclean GD930HSP is a 4 Gallon Dry HEPA Vacuum that meets the EPA's standards...
-
$849.00 Shop Now
Still Have Questions?
A member of our team is here to help! Click on “Get Started ➤” below to book a consultation with a member of the HOMECLEANSE team. We have a few quick questions that will help us put together a roadmap to solve or prevent all of your mold problems.
Two minutes of your time could lead to better health for you and your family.
Must-Have Indoor Air Quality Tools
-
EC3 Laundry Additive
Add EC3 to every rinse cycle to rinse away mold, bacteria and musty odors from...
-
$23.00 Shop Now -
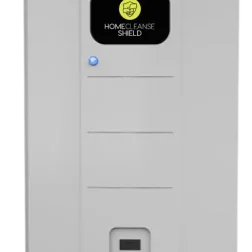
HomeCleanse Shield
Turn your HVAC into the healthiest feature of your home.
-
$2,495.00 Shop Now -
HomeCleanse Cleaning
Take your cleaning to the next level buying all the tools we use to keep...
-
Price range: $299.00 through $549.00 Shop Now -
Mold & Bacteria Contents Cleaning
Remove harmful pollutants that accumulate in the dust of your home. (Options available for renters...
-
Price range: $99.00 through $349.00 Shop Now -
EC3 Mold Solution Concentrate
Micro Balance EC3 Mold Solution Concentrate is a natural botanical that removes mold spores, bacteria,...
-
$33.00 Shop Now -
The Dust Test
Optimizing Air Quality starts with finding what’s not optimal. *Detects 36 different species of mold...
-
$299.00 Shop Now -
EuroClean 4 Gallon Hepa Vacuum
The Euroclean GD930HSP is a 4 Gallon Dry HEPA Vacuum that meets the EPA's standards...
-
$849.00 Shop Now