
Remediation doesn’t just include getting rid of that single mold issue. Particles from indoor mold growth can easily spread to other areas of the home as well and land on whatever surface they come into contact with. From shoes and clothes to coffee tables and couches, nothing is off-limits to this fungus. That’s why it’s important to know how to clean belongings after mold remediation.
")
To make it even easier for those planning on tackling this cleansing project, HomeCleanse is rolling out the Contents Cleaning Kit to help you get started. This package is packed full of top-rated products that will help you decontaminate your belongings. They’re so great, we use them every day while remediating.
WHY CLEAN BELONGINGS AFTER MOLD REMEDIATION?
Growing mold reproduces by creating microscopic spores that it releases into the air. It’s similar to how a weed produces seeds, except these particles are invisible to the naked eye. These spores will then ride the air current to wherever it may lead and stick like glue to any surface they come into contact with.
Now, picture mold that’s growing indoors. As long as it’s alive, it will continue to produce and release spores, most of which remain trapped within the walls of the building. Anything inside the home has the potential to become contaminated if a spore lands on the surface. Some species can also create and release microscopic toxins called mycotoxins. These tiny toxins stick to surfaces as well and are even more difficult to get rid of than spores.
While remediation will take care of the moldy situation, the indoor contamination doesn’t just end there. All of the items within the room or home may now also be contaminated with tiny mold and toxin particles. Continued exposure to these particles can cause any adverse health reactions to persist until the contamination is completely removed.
Hence, why learning how to clean belongings after mold remediation is crucial.
MOLD EXPOSURE AND HEALTH
Mold spores and toxins can be found throughout the world in nature, and typically don’t cause an issue when encountered throughout the day. They’re pretty much impossible to avoid. Symptoms related to mold generally develop when an individual is exposed to a high volume of particles, such as those trapped inside of a home. The immune system can handle a few particles throughout the day, but a flood of them is another story entirely.

Researchers are still trying to nail down the extent to which mold exposure can affect the human body, but it’s a difficult subject to tackle. There are a multitude of components that play a role in whether someone will experience adverse reactions, what symptoms will develop, and the extent to which they will suffer from the effects. Aspects such as genetics, preexisting conditions, immune system status, presence of mycotoxins, length of exposure, and species of mold all play a role.
What they do know is that anyone with a developing or compromised immune system is more likely to experience symptoms faster and to a greater extent.
The truth is, no two individuals react to mold exposure the same way. One person may have the occasional runny nose, and another may develop over 30 different symptoms.
The potential chance of illness and chronic reactions is enough of a reason to create an action plan on how to clean belongings after mold remediation. Those adverse health reactions being experienced will not go away until the contamination in the home is removed.
HOW TO CLEAN BELONGINGS AFTER MOLD REMEDIATION
To properly clean belongings after mold remediation, you’ll first need to determine which type of surface you’re working with. Each requires a different cleansing technique.
THESE THREE SURFACES INCLUDE:
Porous: Liquid will be absorbed into the surface. These can include clothing, couches, and lampshades.
Non-porous: Liquid will pool on top of the surface. These can include finished wood, sealed countertops, and glass.
Semi-porous: Some of the liquid will pool on top and some will seep into the surface. These can include unsealed wood furniture, leather, and some plastic.
Once you know what type of surface you’re about to cleanse, you can get started on the decontamination process.
STEPS TO CLEAN BELONGINGS AFTER MOLD REMEDIATION BASED ON THE SURFACE TYPE

Keep in mind that as you’re making a plan to clean belongings after mold remediation, the more thorough you are, the better. Mycotoxins and bacteria are particularly difficult to remove, which is why HomeCleanse created a Home Detox protocol that utilizes a 3-stage wipedown process to get rid of any contamination present.
That’s why we suggest completing the processes below at least 3 times to help ensure the item is as cleansed as possible.
POROUS SURFACES
Err on the side of caution with these items, but follow the steps below for the best results if you’re attempting to keep a porous item.
THESE STEPS INCLUDE:
- Put on your safety gear.
- For laundry machine-washable items, throw them in with an EPA-approved cleaning product like EC3 Laundry Additive. Completing a few washing cycles is best to help ensure as many particles are removed as possible.
- Vacuum every inch with the HEPA vacuum, including corners and crevices.
These surfaces are the most difficult to clean. Their porous nature means that mold particles can slip deep within the fibers and be impossible to remove. A good rule of thumb with these items is to toss out as many as you can. When dealing with mold exposure and the symptoms that can go along with it, it’s better to be safe than sorry.
Sometimes, this isn’t an option. A belonging could be a family heirloom or replacement that just doesn’t fit within the budget at the moment. If that’s the case, clean the belongings using the steps above and then reintroduce them one at a time. Should any health reactions begin after it’s back in the home, there are probably particles still existing on it. You can try to clean the belonging again, but it’s time to start considering parting with the item.
At the end of the day, your continued health and that of your family are more important.
NON-POROUS SURFACES
These surfaces are where your Contents Cleaning Kit will come into play. The kit comes with a detailed set of instructions for use that you can keep and refer back to whenever needed. Again, before you begin cleaning, decide which items you have to keep and which you can get rid of.

ONCE YOU HAVE A PILE OF KEEPERS, FOLLOW THE STEPS BELOW:
- Put on your safety gear.
- Use a HEPA vacuum on every inch and crevice of the item.
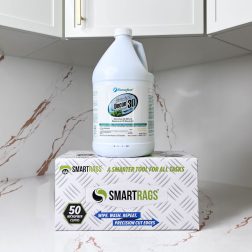
- Spray the item with an EPA-approved cleaning product like Benefect Decon 30.
- Allow the cleaning product to sit for at least 10 seconds before wiping away with the microfiber towel.
- Repeat this process at least three times to remove lingering mycotoxins and bacteria.
- Allow the surface to dry completely before reintroducing it into the home.
HEPA vacuums use specialized technology to remove microscopic particles like mold spores, microfiber towels are 100 times better at wiping away small particles, and botanical cleaning products safely and effectively remediate mold.
Again, keep in mind that mycotoxins and bacteria are particularly difficult to remove, so this cleaning process should be completed at least three times for the best results. Each of these items should also be reintroduced one at a time just to make sure they’re decontaminated and don’t spark any adverse health reactions for those in the home.
SEMI-POROUS SURFACES
These are tricky because it depends on how penetrable the surface is. If you can clean them using the non-porous method outlined above, opt for that route. If there’s borderline porous, follow the porous instructions instead.
A great idea is to clean them and then seal the surface.
From there, reintroduce them one at a time. If you or a family member begins experiencing symptoms, consider tossing the item out and investing in a new one.
Read Next
ADDITIONAL TIPS TO SUCCESSFULLY CLEAN BELONGINGS AFTER MOLD REMEDIATION
When you’re finished using all of those microfiber towels, make sure to toss them out! They’re filled with moldy particles you do not want in the home, so get rid of them and replace them with brand new ones.
When in doubt, contact an expert to get their advice. Always err on the side of caution so that your indoor space is safe for you and your family. No one wants to live in a home that’s making them feel unwell.
If you’re facing an entire home filled with contamination, consider bringing in professionals like HomeCleanse to come in and decontaminate your personal belongings. They’ll be able to clean every item before it goes back inside and help guide you on how and when to reintroduce them.

PLAYING IT SAFE
It may seem like a pain to go through this extensive cleansing protocol, but it’s worth the work! We spend a huge portion of our day at home. If that indoor environment is filled with all kinds of harmful particles, the health of those inside the home can suffer.
Making a plan to clean belongings after mold remediation can help you or a member of your family avoid ongoing symptoms and chronic illness. Building mold awareness is key to ensuring a safe and happy home environment so that you can focus on what’s important: enjoying a healthy life and spending time with those you love.
Health begins at home. ™
Build Your Home Health Cleaning Arsenal
Showing all 6 results
-
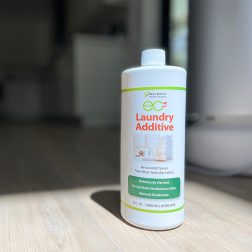
EC3 Laundry Additive
Add EC3 to every rinse cycle to rinse away mold, bacteria and musty odors from...
-
$23.00 Shop Now -
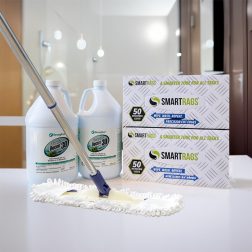
HomeCleanse Cleaning
Take your cleaning to the next level buying all the tools we use to keep...
-
Price range: $299.00 through $549.00 Shop Now -
Mold & Bacteria Contents Cleaning
Remove harmful pollutants that accumulate in the dust of your home. (Options available for renters...
-
Price range: $99.00 through $349.00 Shop Now -

EC3 Mold Solution Concentrate
Micro Balance EC3 Mold Solution Concentrate is a natural botanical that removes mold spores, bacteria,...
-
$33.00 Shop Now -
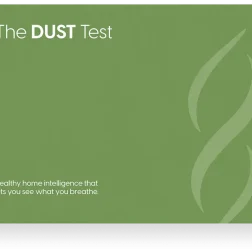
The Dust Test
Optimizing Air Quality starts with finding what’s not optimal. *Detects 36 different species of mold...
-
$299.00 Shop Now -
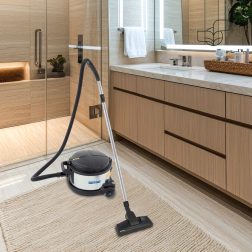
EuroClean 4 Gallon Hepa Vacuum
The Euroclean GD930HSP is a 4 Gallon Dry HEPA Vacuum that meets the EPA's standards...
-
$849.00 Shop Now
Still Have Questions?
A member of our team is here to help! Click on “Get Started ➤” below to book a consultation with a member of the HOMECLEANSE team. We have a few quick questions that will help us put together a roadmap to solve or prevent all of your mold problems.
Two minutes of your time could lead to better health for you and your family.
Must-Have Indoor Air Quality Tools
-
EC3 Laundry Additive
Add EC3 to every rinse cycle to rinse away mold, bacteria and musty odors from...
-
$23.00 Shop Now -
HomeCleanse Shield
Turn your HVAC into the healthiest feature of your home.
-
$2,495.00 Shop Now -
HomeCleanse Cleaning
Take your cleaning to the next level buying all the tools we use to keep...
-
Price range: $299.00 through $549.00 Shop Now -
Mold & Bacteria Contents Cleaning
Remove harmful pollutants that accumulate in the dust of your home. (Options available for renters...
-
Price range: $99.00 through $349.00 Shop Now -
EC3 Mold Solution Concentrate
Micro Balance EC3 Mold Solution Concentrate is a natural botanical that removes mold spores, bacteria,...
-
$33.00 Shop Now -
The Dust Test
Optimizing Air Quality starts with finding what’s not optimal. *Detects 36 different species of mold...
-
$299.00 Shop Now -
EuroClean 4 Gallon Hepa Vacuum
The Euroclean GD930HSP is a 4 Gallon Dry HEPA Vacuum that meets the EPA's standards...
-
$849.00 Shop Now