
Welcome to HomeCleanse Guardian
You’ve just taken the next step toward understanding the air you breathe at home. Let’s get your Guardian set up and reading your space.
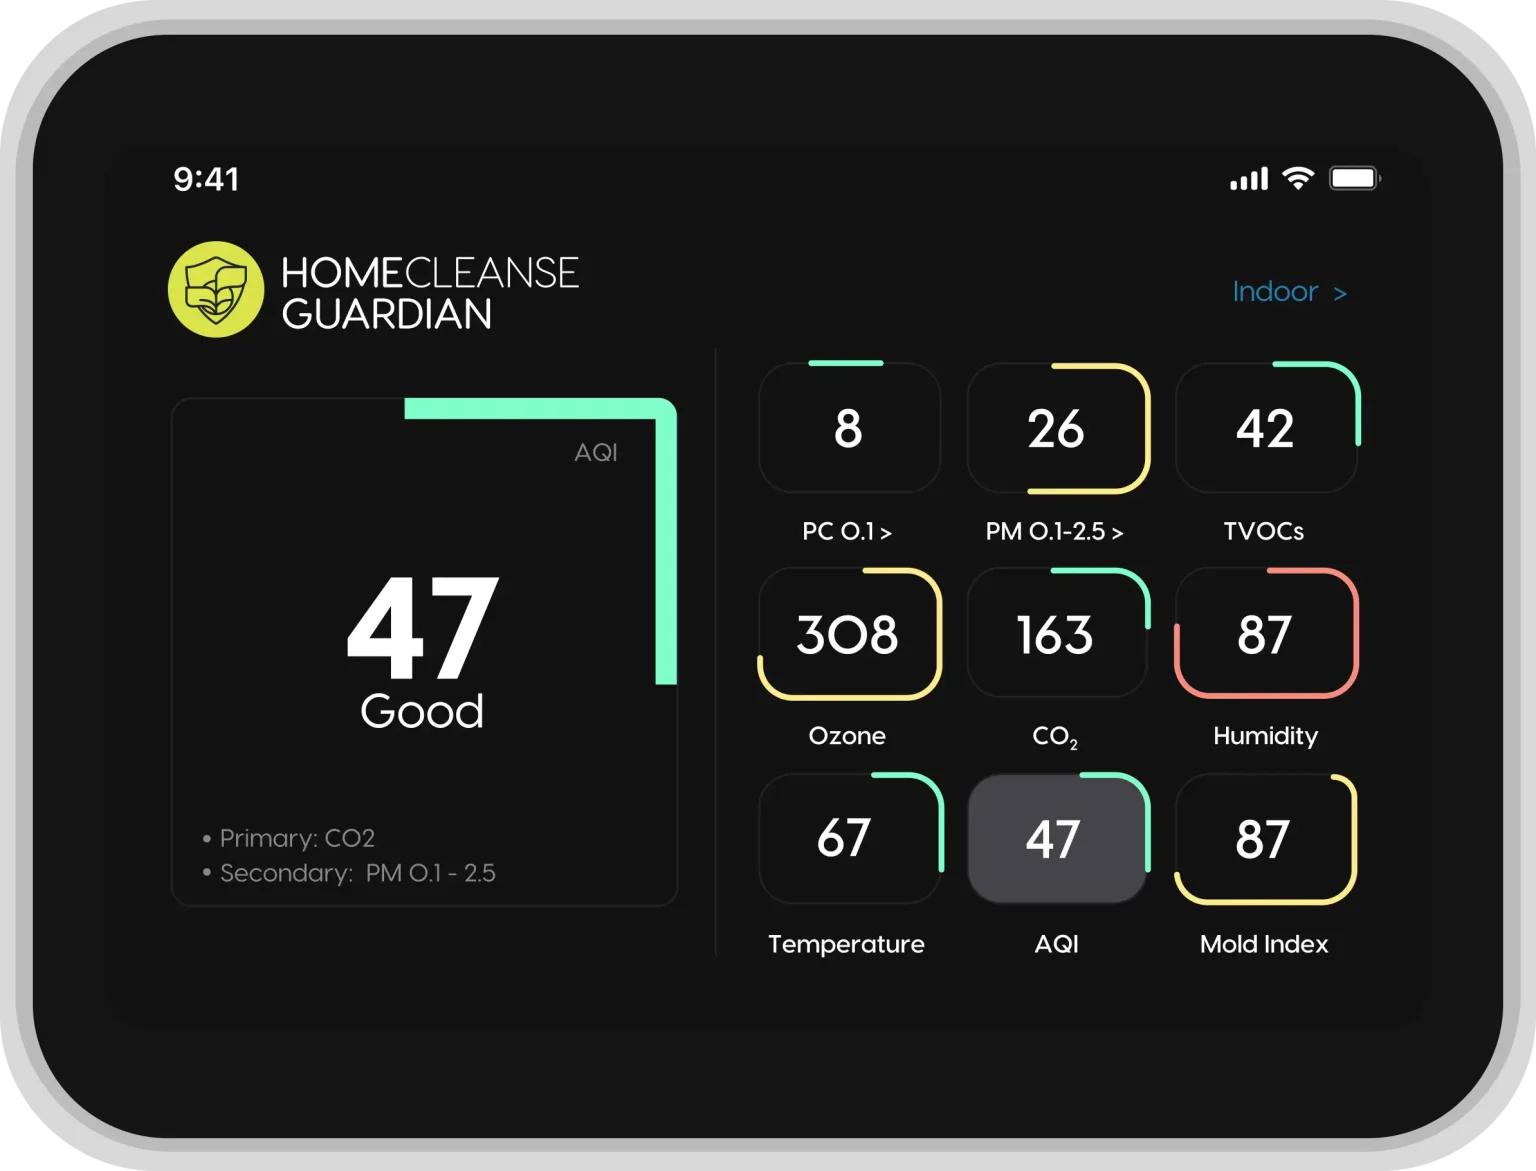
A Few Minutes Away From A Healthier Read On Your Home
Everything you need is in the box. Here’s what setup asks of you. Tick each one off as you go.
Everything included
Your Guardian and every component ship in one box, with no extra parts to buy.
Wi-Fi connection
A stable Wi-Fi network, or a wired Ethernet connection if you prefer.
About 10 minutes
That’s the whole setup, start to finish. There’s no rush, and you can pause anytime.
Phone or computer
Any phone, tablet, or computer will do for the dashboard step.
You’ll Need
Tap each item once you’ve got it ready.
Let’s Make Sure Everything Arrived Safely
Here’s everything that comes in the box — and what each part does.
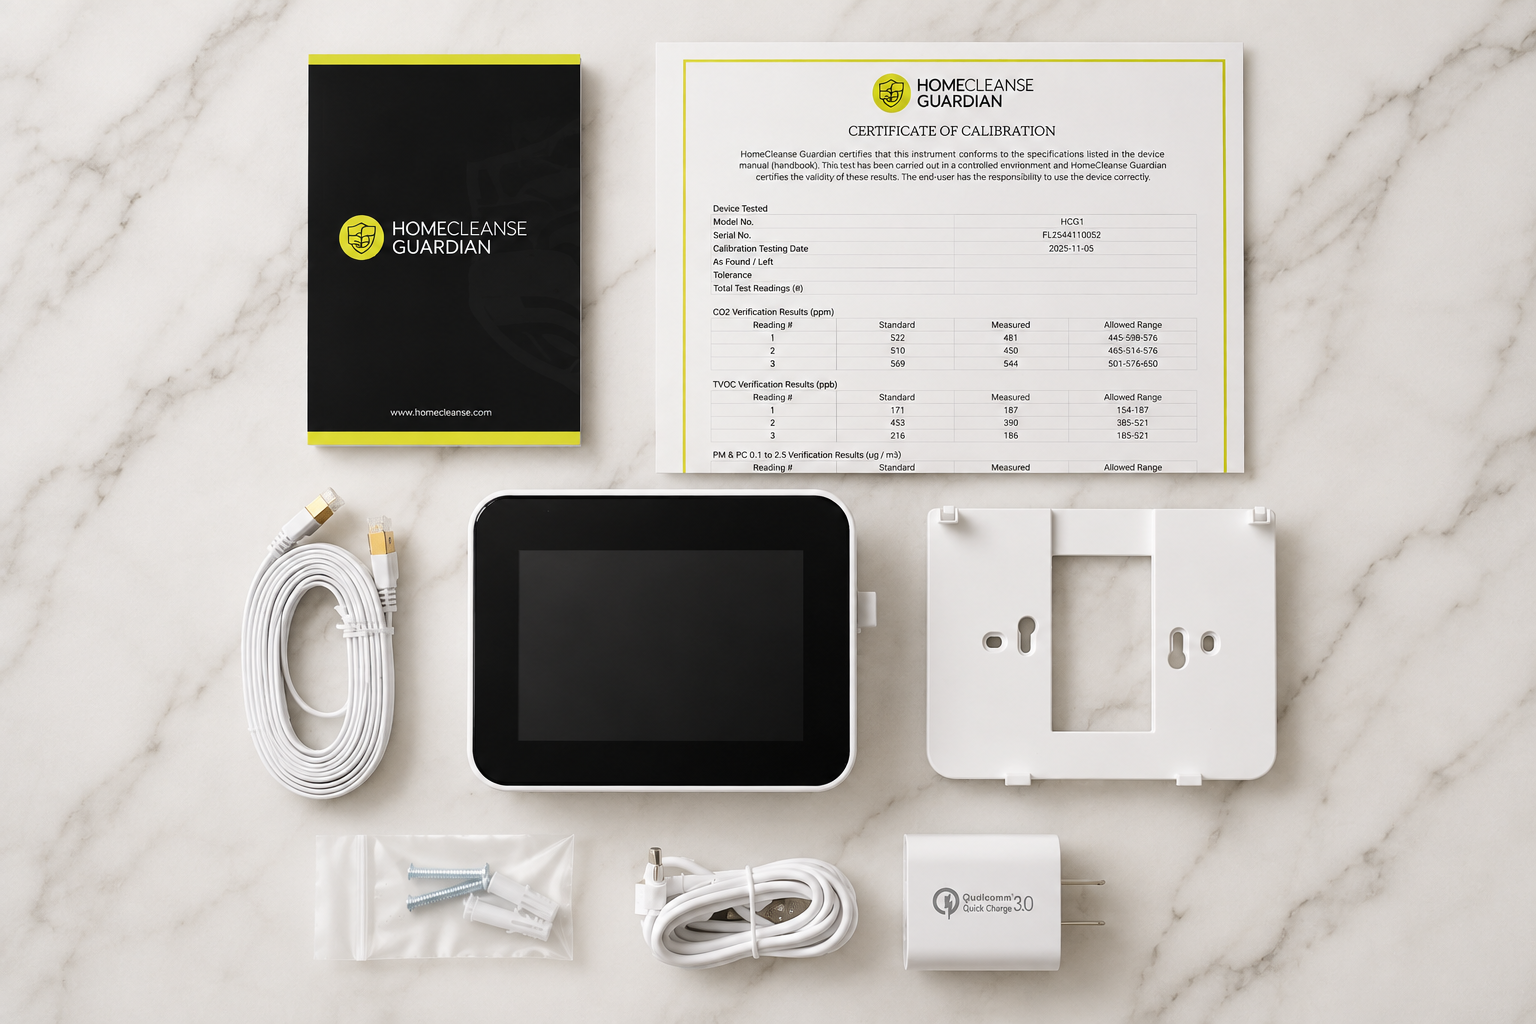
Guardian Monitor +
Sensor Capsules +
USB-C Power Adapter +
USB-C Power Cable +
Wall Mount +
Mounting Hardware +
Quick Start Guide +
All seven, accounted for
Where You Place Guardian Matters
Put it where you spend the most time and air can move freely around it. That’s how you get the truest picture of your space.
Recommended
- In frequently occupied living spaces
- On an interior wall with good airflow
- Away from direct sunlight
- At the recommended mounting height
- Where air can circulate freely around it
Avoid
- Near windows or exterior doors
- Directly beside supply or return vents
- Near fireplaces or space heaters
- Above radiators or HVAC equipment
- In bathrooms or high-moisture areas
- In kitchens where cooking skews readings
- Behind furniture, curtains, or obstructions
Wall Mount or Tabletop?
Guardian works well in either configuration. Wall mounting is ideal for permanent installation, while tabletop placement is a great option if you’d like the flexibility to move Guardian between spaces. Whichever you choose, be sure the device has plenty of open airflow and represents the space you’d like to monitor.
Wall Mount
- Permanent installation
- Clean, tucked-away look
- Ideal for long-term monitoring
Tabletop
- Easy to relocate
- Great for testing different rooms
- No drilling required
Before moving on, confirm:
Bring Your Guardian Online
Plug it in, let it wake up, and connect it to your network. From here, it starts sharing data with your dashboard.
Plug In
USB-C to power
Power On
Display wakes up
Connect Wi-Fi
Choose your network
Connected
Ready for data
Power on
Plug your Guardian into power with the included USB-C cable and adapter. The display illuminates and startup begins. Let it finish before you continue.
Your Guardian Is Starting Up
The first startup may take a few moments while Guardian initializes its sensors and prepares to begin monitoring. Avoid unplugging the device or changing settings unless prompted. Once startup is complete, continue connecting Guardian to your network.
Connect to Wi-Fi
On the Guardian display: open Settings → Network, choose your Wi-Fi network, enter your password, and confirm.
Confirm you’re connected
Once connected, Guardian starts collecting and sending data. Trouble connecting? Visit Troubleshooting.
- Connect an Ethernet cable from your router to your Guardian.
- Guardian detects the wired connection automatically, so no Wi-Fi setup is needed.
- Confirm the connection indicator on the display, then continue.
Good to know
Guardian may take a few moments to establish its first connection. That’s a normal part of setup.
Complete Device Setup
You’re almost ready. Before exploring your dashboard, let’s confirm a few final device settings. Take a moment to review these items on your Guardian, and check them off as you go.
Confirm Date & Time
Confirm the correct date and time.
Confirm Installation Location
Verify your installation location, if prompted.
Confirm Both Sensors Are Detected
Confirm your Guardian shows both sensors as active.
Check for Firmware Updates
Make sure your Guardian is running the latest firmware.
Name Your Guardian
Give it a name, such as “Living Room” or “Upstairs,” if supported.
Confirm Guardian Is Sending Data
Confirm your Guardian is actively sending data.
Everything looks good
You’re ready to explore your dashboard.
Welcome To The Guardian App
Your Guardian is now online and ready to begin monitoring your indoor environment. The Guardian app is where you’ll view your live air quality data, monitor trends over time, receive alerts, and better understand what’s happening inside your home. Let’s get you connected.
Your live AQI 1
One number for your whole home, updating on its own.
Every measurement 2
CO₂, humidity, temperature and particulates, at a glance.
Jump anywhere 3
Reach trends, alerts, and reports from the side menu.
Get The App And Connect Your Guardian
Download the Guardian App
Download the Guardian app on your mobile device to access your Guardian and view your indoor air quality data.

Create Your Account
Open the Guardian app and create your own account with your email. The app sends a verification code to confirm your address (not a password), so check your inbox and enter it. Once your account has been created, you’ll be ready to connect your Guardian.
Connect Your Guardian
Make sure your Guardian is connected to Wi-Fi or Ethernet first, so its screen shows connected. In the app, choose add new device and name it by its location, then pair by scanning the QR code or entering the serial number. You will find the serial number on the box, on the insert inside, or on the Guardian under Settings, Device Details. Once connected, you’ll begin receiving live indoor air quality data directly within the app.
Confirm You’re Connected
Once your Guardian appears online, setup is complete and your dashboard will begin displaying live indoor air quality data.
Explore the app
Once you’re connected, here’s a quick look at the tools you’ll use most often.
Live Readings
View your home’s current indoor air quality measurements in real time.
Trends
See how your indoor environment changes throughout the day and identify long-term patterns.
Alerts
Receive notifications when selected air quality measurements move outside of your preferred range.
Reports
Review historical data and generate reports whenever you need them.
Good to know
Your Guardian begins collecting data immediately, but your app becomes even more valuable over time. As more information is collected, you’ll gain a clearer understanding of how your indoor environment changes from day to day and season to season.
What Am I Looking At?
Some numbers may drift as Guardian learns your space over the first while, and that’s completely normal. Tap any card to see why it matters.
Air Quality Index
A single, at-a-glance score for your indoor air.
The AQI rolls several measurements into one number, so you can read your air at a glance before digging into specifics.
Temperature
How warm or cool your space is.
Comfort and humidity are linked, so temperature helps you read the room alongside the rest.
Relative Humidity
How much moisture is in your air.
Humidity shapes how a space feels and behaves. Watching it helps you keep conditions where you want them.
Carbon Dioxide (CO₂)
A marker of fresh air and ventilation.
CO₂ tends to climb in closed rooms and drop with fresh air, giving you a simple read on ventilation.
TVOCs
Total volatile organic compounds in the air.
Everyday things like cleaning, cooking, and new furnishings release VOCs. Tracking them shows how activities move your air.
Fine Particulate Matter
PM1, PM2.5, and PM10: tiny airborne particles.
Fine particles come from cooking, dust, and outdoor air drifting in. Guardian tracks the size ranges so you can see what’s in your air.
Why trends matter more than any one number
Indoor air changes all day: cooking, cleaning, opening a window, the weather outside. Rather than fixating on a single reading, Guardian helps you see patterns over time, so you can make better decisions about your space.
If you’ve turned on alerts, Guardian can nudge you when a measurement drifts out of your preferred range, even when you’re away.
You’re All Set
Your Guardian is up and monitoring your indoor environment. From here, it keeps collecting data, and your picture of your home gets clearer every day.
Continue Learning
Guardian is now monitoring your indoor environment, and your dashboard will continue building a clearer picture of your home’s air quality over time. Whenever you’re ready to learn more or need a helping hand, these resources are here for you.
Understand Your Readings
Learn what each air quality measurement means, why it matters, and how to interpret changes over time.
Learn More →Guardian Care & Maintenance
Keep Guardian performing its best with cleaning, maintenance, sensor replacement, and long-term care.
View Care Guide →Help & Support
Find answers to common questions, troubleshooting guides, downloadable resources, warranty info, and ways to reach our team.
Visit Support →Understanding Your Dashboard
Live readings, trends, alerts, and device status in one place.
Learn More →Warranty & Support
Coverage, returns, and how to reach a HomeCleanse guide.
Learn More →Prefer to talk to a person? Visit Help & Support